Good afternoon friends
I've been working on another book recently using my Wonky House Cover kit. As the first time I used this kit I created something rather grungy and darker, duller colours I thought I would try to show the versatility of the design by creating a softer feel.....
You will be the judge of whether I succeeded or not LOL. I'll show you the finished book first; then, if that's all you are interested in you can stop looking, though I will follow with some of the steps taken to get there.
So here goes......the finished book.
Close up of the cover. I added a small Tando Creative Flourish to the front which I felt complimented the book.
Back and spine detail. The pages have been made using patterned cardstock.
So that is the finished book. What follows is some of the stages to get there.......
Begin by assembling the cover and spine using fabric and DecoArt Faux Finishing Medium.
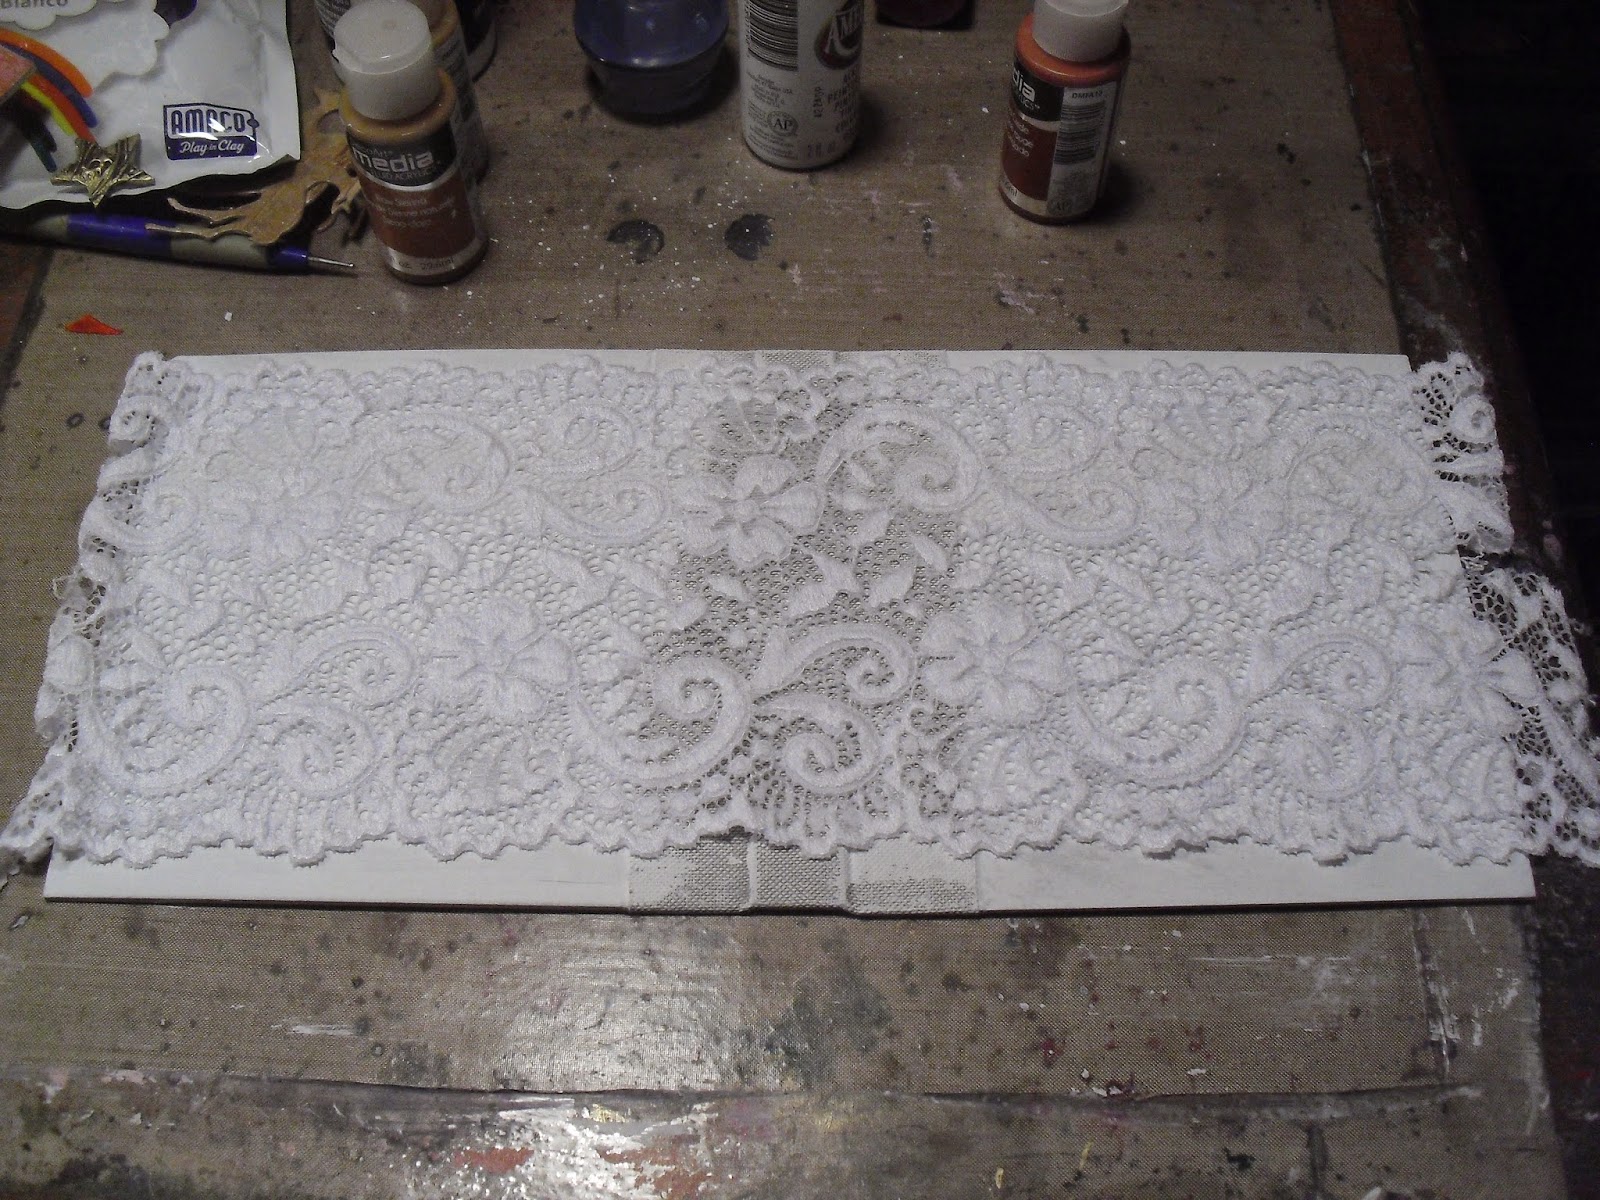
Paint the covers with white paint and use double sided tape to adhere lace to the cover, overlapping the edges as seen.
Colour the whole thing with DecoArt Media Fluid acrylics and water. Add DecoArt Faux Finishing Medium and brush over the whole piece. You will see that it further blends and softens the colours as well as adding further adhesion to the lace and cover. Set aside and leave to dry thoroughly.
When dry, work over the cover with white paint and a very light touch to highlight the texture of the lace.
Once this is dry it's a good time to add the inner pages and leave pressed under a weight to dry.
Paint the house white and leave to dry.
Add colour using the same two colours of fluid acrylic used on the cover. When touch dry stamp the Alphabet Soup background stamp onto the house with Orange Blossom Archival ink.
Leave to dry for a few moments and, taking a moist wipe, begin to rub away to distress areas. As it is not totally dry you will rub away some of the top colour to reveal the white underneath. Continue until you are happy.
Once it is dry, flip over and use masking tape or similar to cover the apertures of the doors and windows.
Flip it back ad add a sprinkle of fine glitter. Bush of the excess and you will be left with a lovely shimmer where the glitter has stuck to the tape.
Flip over; cut a strip of co-ordinating lace ribbon long enough to wrap around the whole cover. Position and tape in place before adding glue
Position in place onto the front cover and press in place and leave to dry thoroughly, either under a heavy weight or
Or, if you have one, a large flower press works a treat. Now we are back to the beginning. Once everything is dry, you can embellish to your heart's content.
I added painted the flourish with blues and stamped the words in black archival ink. I added the larger flower to the book and then the flourish was added to the cover with 3d foam tape. A little matching flower was added to the flourish. I added some blue tones to the book with the same paint to tie the two pieces in. I used a glue gun to add the metal leaves (broken jewellery) wrapping it around the spine and securing only on the front and back to allow for movement when opening the book. A metal butterfly adds the final finish to the top.
Job done! Hope you like it.


4 comments:
I knew my flower press would come in handy for something one day...great tut. Thanks.
Certainly a different interpretation of the cover but absolutely super. Thanks Neil
I love the cover.
Marilyn
Two totally different takes on your book cover! This is just as stunning Neil x
Post a Comment