Good afternoon friends.
I'm finally getting some of my personal projects finished. (Insert "lots of photos" warning here LOL) Things that have been started ages ago but then were put to one side for one reason or another. Such a piece is today's offering. It was something that I picked up at a boot fair in the summer and I got as far as this with it
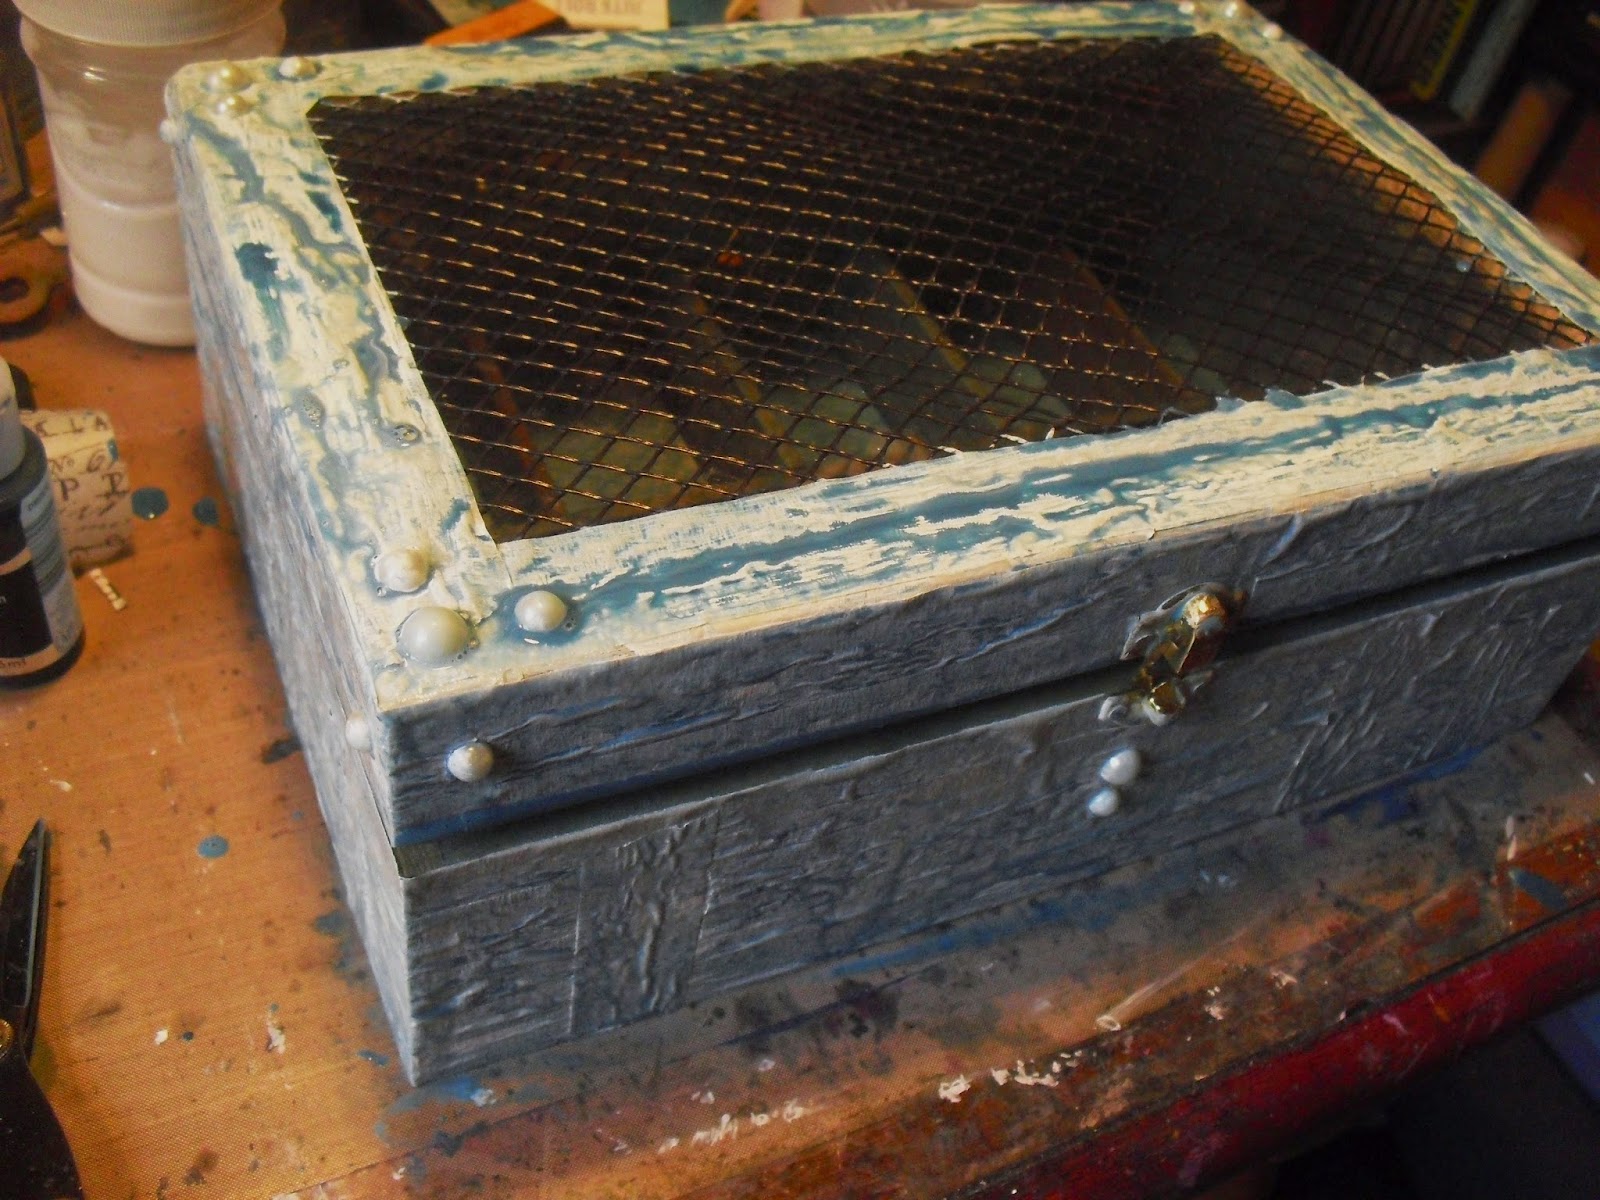
It's a lovely wooden box with lovely compartments. I covered the outside with strips of masking tape putting a piece of gutter mesh over the glass and taping it down as I went along.
and some pearls. Then it got left, until now. What follows is a step by step of the process but I will say this now for anyone who thinks they want to give this a go; don't bother sticking the pearls on now, they will come off later in the process! Anyway, on with the project.....
The first thing I did is give the outside of the box a coat of gesso then while that was drying I made up a wash of DecoArt Prussian Blue Fluid Acrylic and essentially "stained" the top compartment.
I then used the same wash on the outside of the box and left it all to dry thoroughly.
What I haven't got a photo of is the lid. I decided I wanted to "hide" the inside of the box so I flooded it with a few colours of glass paint.
When it was dry I then painted the box with Americana Raw Umber paint, left it for around 20 minutes to begin to dry and then began to wipe it back. (It is now that I began to lose the pearls)
This is where you really get to see the benefit of covering the box with masking tape as it really highlights and brings out some amazing textures.
I took the pearls and used Distress Paint to add colour and set aside to dry.
Once the box was dry I began to stamp with my Fantasy Background stamp keeping it off the acrylic block and just pressing it randomly. I think it gives a really cool effect.
This is the finished box ( I'll fill in the details as I go)
I just love the shabby distressed feel on the outside.
The lid looks pretty cool too. I adhered white on the inside which helps show some of the colours. I snipped open part of the mesh and inserted a MDF cog and a lightbulb charm.
I'm guessing you want to see inside?
The perfect place to keep all my gorgeous bits and pieces from That Craft Place in Eastbourne!
If you look in the lid you can see (maybe!) that I've covered the glass with some patterned paper taped in place with a decorative paper tape. To secure larger pieces I stuck 3 pieces of the tape together and stapled the resulting band to either side.
I was really impressed in finding this box originally, now it's finished and full, I'm even more happy !
This strap holds everything perfectly and now I have everything in one place I am feeling gloriously inspired.....


5 comments:
FAb box!
xoxo Sioux
Your inspiration is amazing...love the random strips of masking tape and the texture. The stamp technique is also great. Thanks for all your great ideas!!!
That's a great box and I love the idea of using masking tape to create texture - the stamping adds to the effect too. What a great find!
What a fabulous transformation, I love it.
xxx Hazel.
Oooh I LOVE this Neil... Such an imaginative project. The mesh lid on the distressed box reminds me of the old meat safe my mum used to have when I was a small child!!
Shoshi
Post a Comment