Good morning friends
Meant to do this yesterday but time ran away from me. Today I thought I'd share one of my favourite things, transforming classic mirri card. Many of you may already know this, but I also know from my recent demo that others don't. There are a fair few photos and mucky paws are virtually guaranteed for those of you giving it a go! Shall we begin? For this I am using silver but experiment with whatever colours you may have laying around.
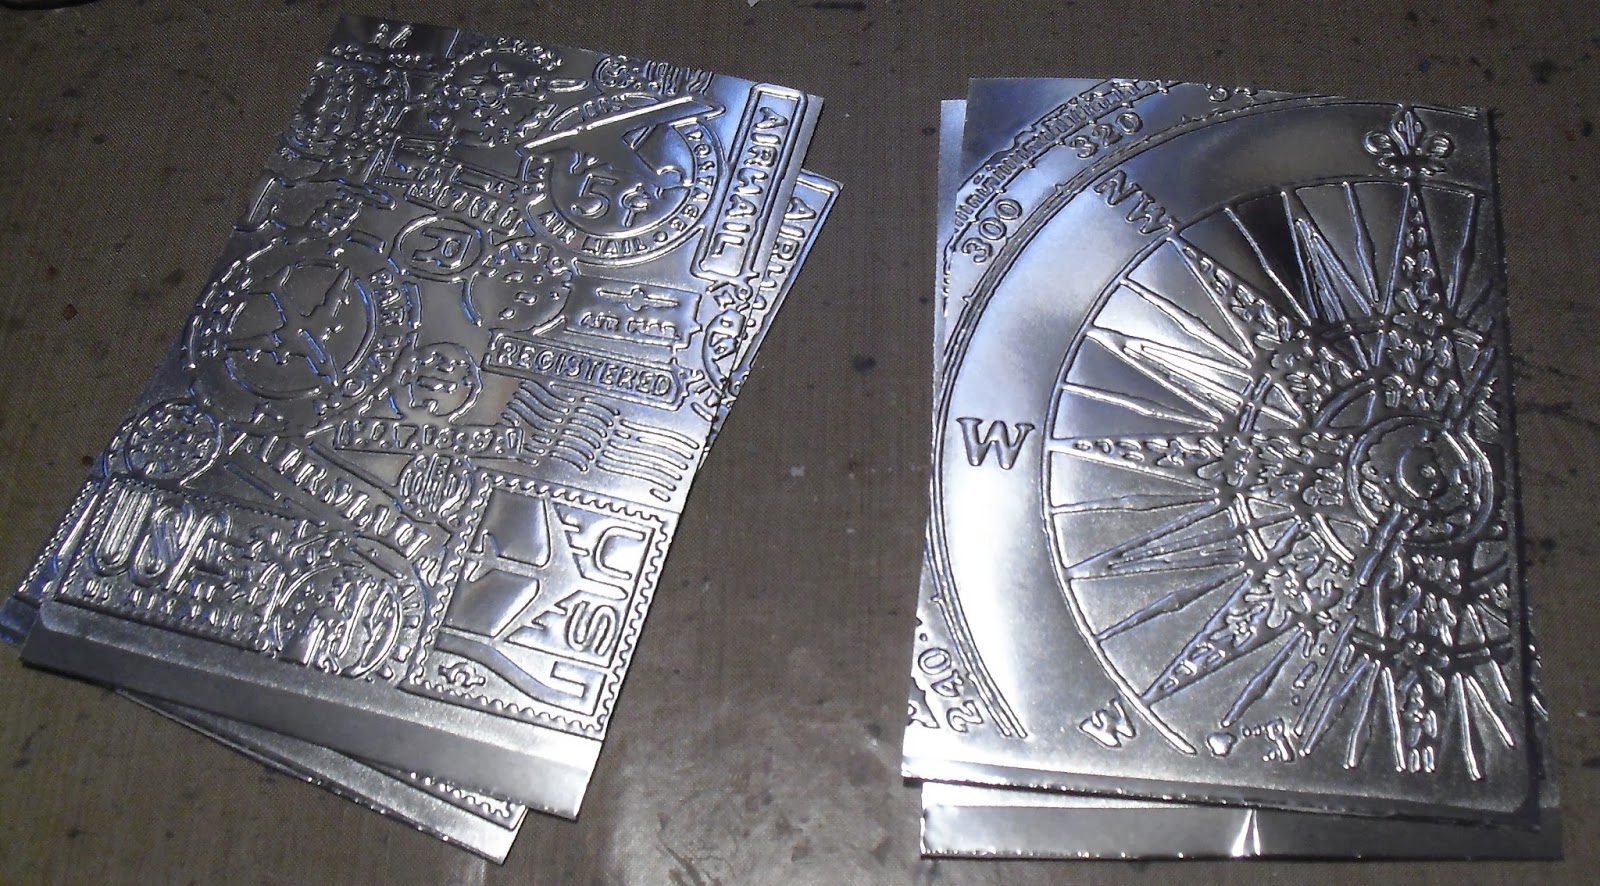
Start off by embossing some card. I used the Tim Holtz Airmail and Compass folders
Then, to add further interest you can use alcohol inks (Or you can skip this and go straight to the next step)
Take 2-3 colours and add onto a felt topped blending tool. (There are so many colours and combos you can use. On this I've used Purple Twilight, Wild Plum and Slate. On the others you will see, combos are;
Lettuce, Pool, Stream and Butterscotch; Ginger and Stonewashed; Red Pepper, Ginger, Cranberry)
Apply to ink to the card, moving it around to cover everywhere. Use a dabbing motion. as you will work you will see how the colours blend and react to give a lovely mottled effect.
So, here are the four I did. Now for the next (mucky) bit.......paint.
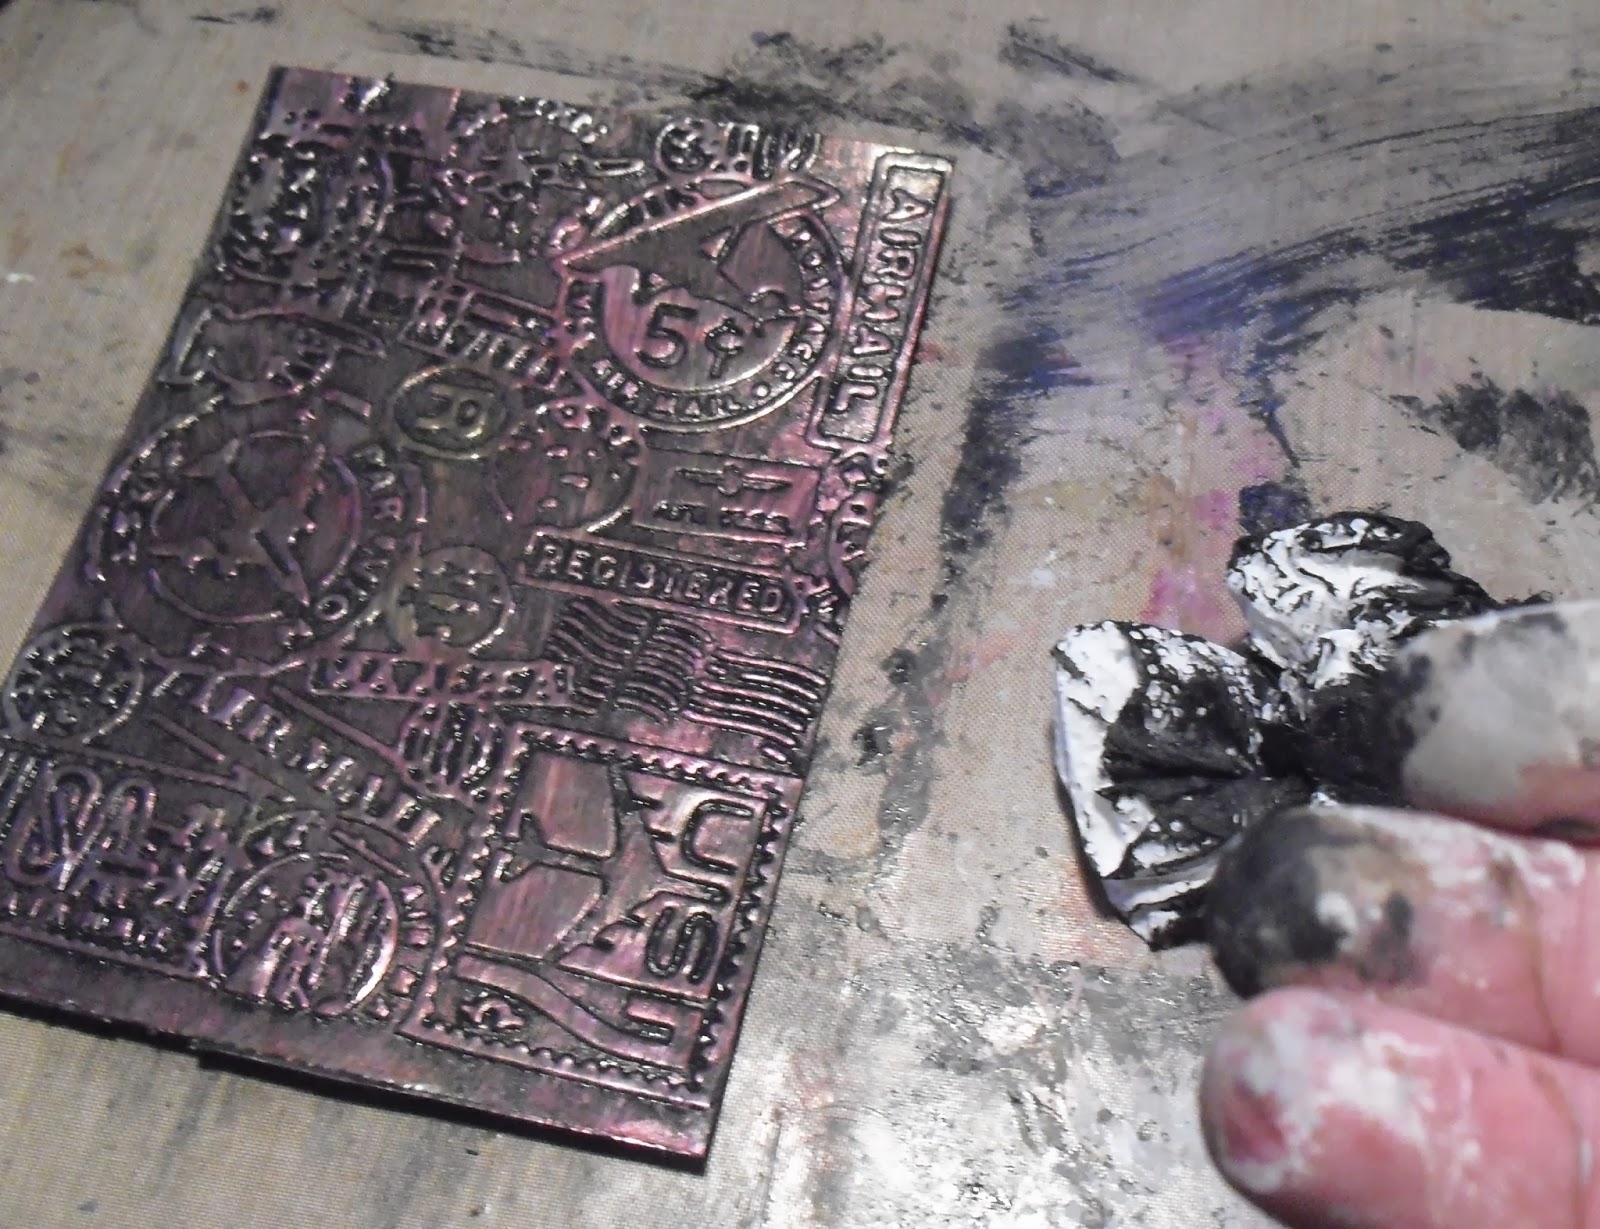
Starting with one piece, choose your paint colour; for this one I am using Americana Warm White. Using a brush, or your fingers as I usually do, cover the whole piece of card with paint making sure that all the cracks and crevasses of the embossing are covered. The trick to this is making sure that you have a decent covering of paint so don't be too shy with the paint.
Once it is covered with paint, take some kitchen towel and begin to dab the card to lift off some of the paint, keep a good supply of towel handy to use when needed and keep at it until you are happy with the result. You can rub too, just keep it light and generally use a circular motion. (Unless of course you want to take a lot of the paint off!)
See, mucky paws.
Back left to right, Burnt Umber, Black, Slate Grey and Burnt Umber combined. Front, Warm White. The colour choice will change the look of the piece. Leave these to dry. Now you can leave them at this stage if you are happy; I usually carry on though.........
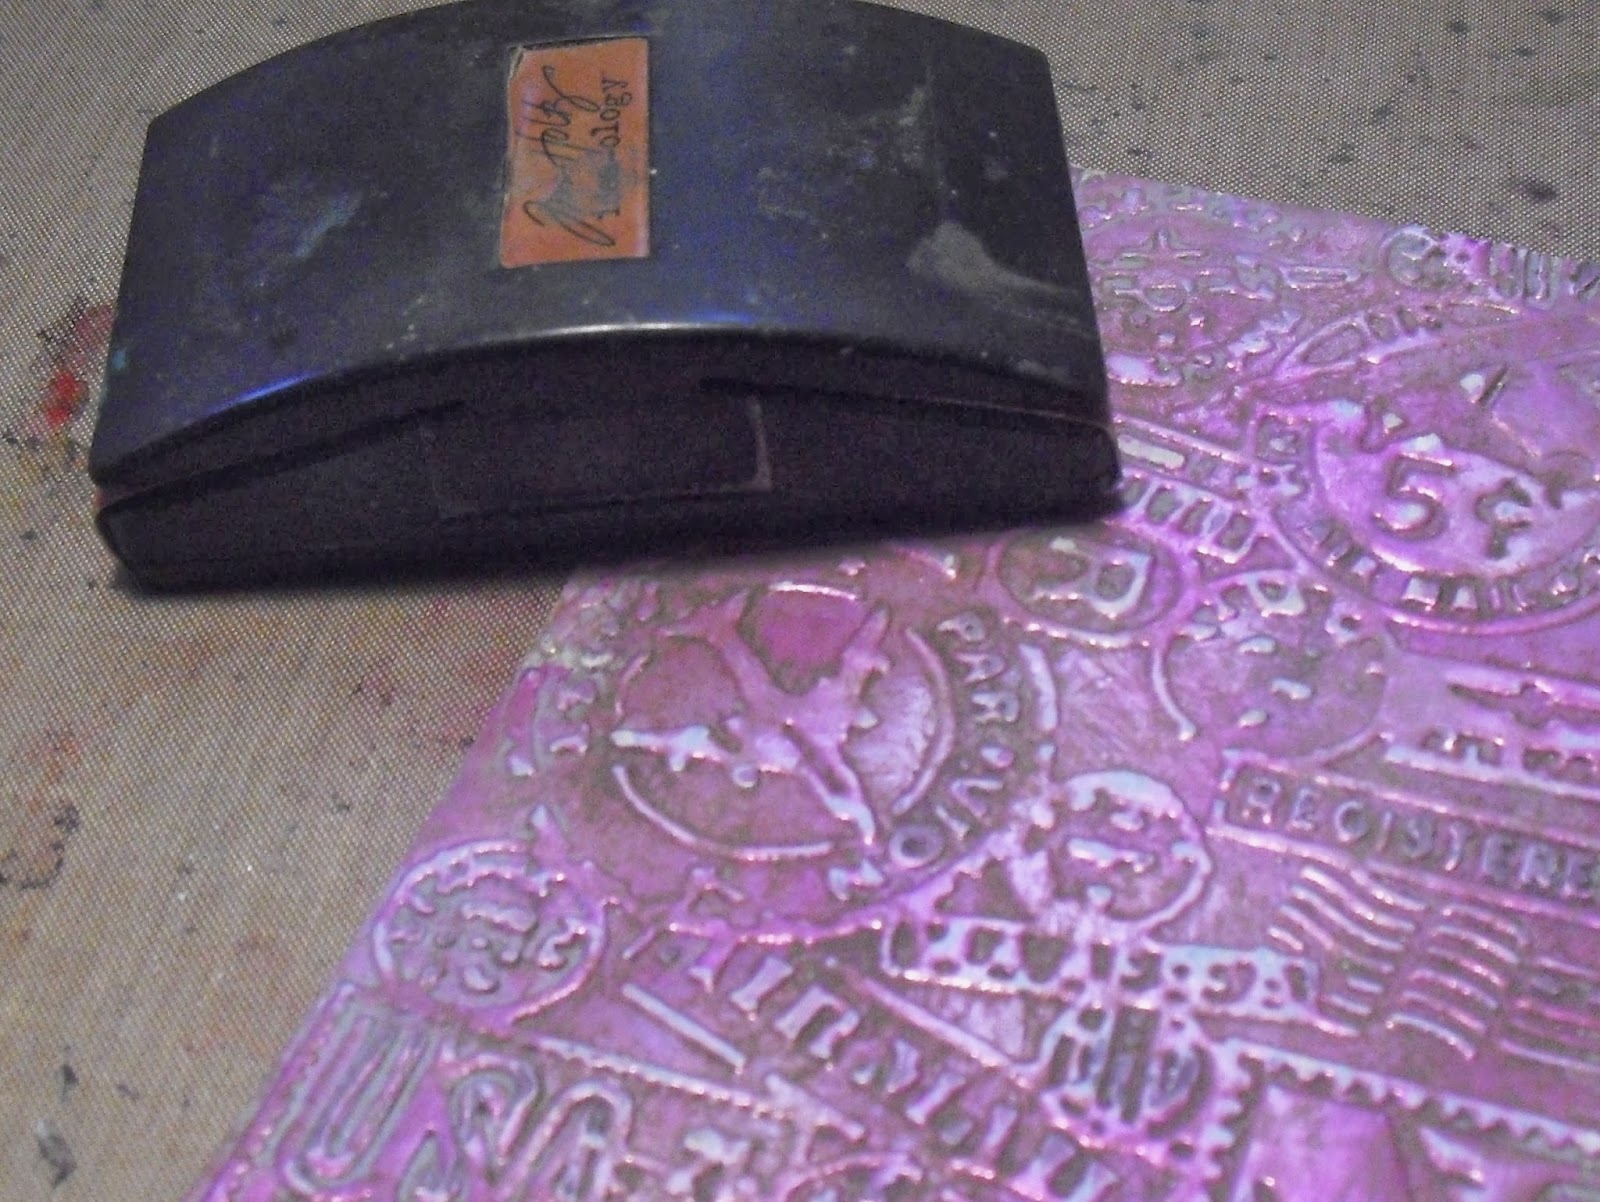
Use a sanding block to sand back some of the raised areas to reveal some of the card below.
Then, take Distress ink and a blending foam and cover the whole piece with ink.
Because Distress Ink has a long open time you can then cover the card with clear Ultra Thick Embossing Enamel and melt with a heat gun. This brings out the shine again and also pops out the colours.
Hope you found this helpful and I guess you are wondering what to do with them? Well, they make great backgrounds on cards, especially men's cards.
Or you could use them like I have here
This is in the front of one of my journals. It is used as a pocket to keep something important handy. Another thing you can do with them....die cut; great flowers!
Another idea; create a "patchwork" of different ones to cover a book, frame or box...
Right, hopefully you haven't gotton bored and wandered off or slipped into a coma..... hope you have a fun and creative weekend.
Off to work soon for me........


11 comments:
Thank you for sharing this Neil, fantastic technique and so much fun x
Thank you I'll have a play later it's fab x
Love Jacquie xxx
I had forgotten about this technique, thanks for the reminder. will try when I', back from Germany. Have a happy christmas . love Francesca
Great tute Neil x
thanks for the tutorial Neil, i have a project in mind this will be wonderfull on x
this looks fabulous fun Neil - thanks for sharing! Hugs rachel x
Ooh I had not seen this using paint at the end. Super cool...will definitely be trying this one. Thanks!
VERY VERY BEAUTIFUL
THANK YOU POUR LE TUTO
Really nice tutorial, thanks so much for sharing!
Really good effect Neil, pretty.
Love this, Neil. What a great technique. Love how you've built up the layers to create a very subtle effect - I thought they also looked pretty cool before you started but what an amazing transformation. I have had some success with embossing old drink cans too - for a more durable material.
Shoshi
Post a Comment