Good afternoon everyone.
In my WOYWW post I mentioned that I was doing something with Perfect Pearls and ink refresher so today I thought I'd show you what I was doing; well, actually more I thought I'd show you what YOU can do!
Lots of pictures to follow.......
Ready? To begin with you will need
Ranger Ink Refresher, Perfect Pearls and card, I'm using black for this.
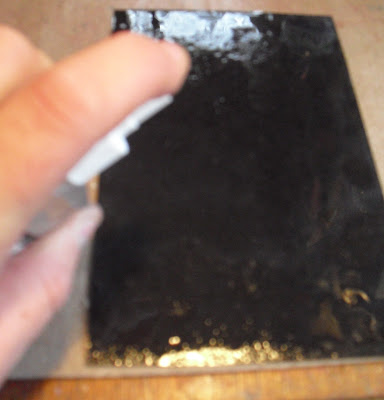
Begin spraying the refresher over the card, you want a good liberal coating
Like this!
Massage it into the card until it is all absorbed in.
Then scrunch it into a tight ball. I scrunch it as tight as I can and roll it in my hand too as if it was a ball of clay. You want a good selection of large and tiny creases. While you are doing this you should begin to feel a difference in the cardstock as it become more supple.
When you open it out you should have something like this.
Take a selection of Perfect Pearl powders and dot randomly over the paper and then
Use a brush to massage and rub the colours, blending and mixing them until the whole page is covered
Like this! You can leave it to dry or dry with a heat gun. The perfect pearls will not rub off as the moisture in the liquid binds them to the page and what you will end up with is a piece of cardstock that feels like supple leather. Pretty amazing; and it stays that way even when dry! So what can you do with it? Well it makes amazing covers for books; backgrounds for cards or you can die cut to create amazing flowers like this
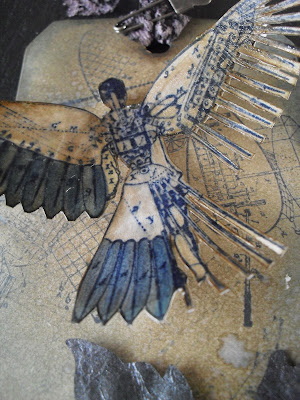
I've used the Tattered Poinsettia die to create a flower out of the piece I just made and added it to the tag as a focal point.
Isn't it gorgeous? Once I'd made the flower I decided to use it on this tag. Love the stamps I stamped the machines onto the background of the tag in Distress ink Chipped Sapphire and used Walnut Stain and Stormy sky to blend. The Image was stamped in the Same Distress inks too and I used Stormy Sky Distress Marker to colour the feathers and lastly added a thin layer of Rock Candy distress crackle over it before mounting with 3D foam.
I hope you give this technique a try because you really have to see and FEEL it to appreciate it fully!
Take care; got to go prep for my class on Sunday!


11 comments:
Great technique Neil and excellent tutorial. The effect is fabulous and thanks for sharing your expertise.
Jo x
I'v done the faux suede before but adding the perfect pearls makes it look delish :)
Thanks for sharing
Von ☺
I couldn't work out why I would need the refresher spray - but maybe I do need some! That flower looks amazing.
thanks, Neil.
I love doing this to my paper, it feels fabulous.
That really is gorgeous! Make your own pearlized paper... and I do so love pearlized paper!
Thanks Neil! Appreciate you posting this tutorial. Can't wait to give it a try! Nan G
do you mind me asking why you use a refresher??? to make the tag blended with perfect pearls ??? do you have youtube and facebook?
This looks good. Thanks for the tutorial. I'm sure I have some perfect pearls in my stash somewhere. Mrs A.
Ooh! I feel so enlightened over learning this technique. I feel especially so since a friend gave me a couple of pieces of paper that I am positive that she used this technique on. When I asked how she did it she just shrugged and told me I don't do background techniques. That is true enough but that doesn't mean I don't want to know. Now I know I just might have to hunt down my refreshed and Perfect Pearls and make one just to show her that while I don't tend to make backgrounds I CAN! And I discovered what she did.
Did i mist a post about the stamps you used? They are cool and where do i get them? The technique you've showed makes me nosy just because it feels like leather. Sounds cool, too.
xoxo
Wow Neil...photos are great...I have never heard of refresher spray... Off to research!
Post a Comment