Friday 28 June 2013

Bit of journaling and classes...

Good morning folks.
I hope this finds you well. This week has been one of those weeks where I've only managed to steal moments in the shed but I guess that is one of the advantages of having a dedicated room; everything can sit there just waiting ready to go! So I managed to finish this quick page in one of my smaller journals
I covered the page with random strips of self adhesive canvas that were left over from another project and used Distress Stains to colour the page roughly.
 I added the doodles with a black pen and wrote out the words. This sums up how I feel at the moment " I have a brain like the Bermuda Triangle; information goes in never to be seen again. "  I added some whiter details with a paint pen.
 I also added some textures to some other pages and left to dry overnight so they are ready today.
 So, not an awful lot going on but just thought I'd touch base with you.
Today I need to finish packing for Sunday's class at The Craft Barn where we'll be working on my Burst Book Cover kit and exploring UTEE and other embossing powders o create a loose leaf journal. Still some places if you want to join in the fun? Details HERE


And, while I'm thinking of it, just a reminder too that I'll be teaching at Crafting Time in Shepreth, Cambridgeshire. First class is on Sunday 20th of July where we will be creating a loose leaf journal with my Ancient Book Cover kit and also beginning to explore art journaling. There are a few places still on the first class so if you are interested in art journaling why don't you join us? Inky fingers and fun guaranteed.
Sneak peek of the Journal

and just a flavour of the first class......details of which are HERE
 After the first class and out  I'll be teaching another 3 classes, each focussing on a different aspect, so you can join me for all four or dip in as you please.
August 25 - Textures and depth - Details HERE

September 15 Hide and Seek - Details HERE
                                        

September 29 - Finishing School - Details HERE


Hope you all have a creative and fun weekend! I might be back later.........

Tuesday 25 June 2013

Who is stealing the time?

Goodly morning peeps
Blink and a week has disappeared, well that's what it feels like to me at the moment. I guess with all the birthdays and stuff it's been a bit crazy here. Not helped by having to drive up to Liverpool on Sunday to collect Alyssa and her luggage and drive back the same day, over 540 miles in one day is a lot of miles for my poor old legs. Did sneak an ice cream down at Crosby Beach though; wasn't going to let the wind and cold deter me!


 Still I have FINALLY managed to finish something to share with you today. Some things just take longer to visualize and then make I find. Worth it though.
So, here is what I've been busy with, in between other stuff. (Photo Heavy warning!)
I started with one of my Ancient book kits and for the front cover I used 
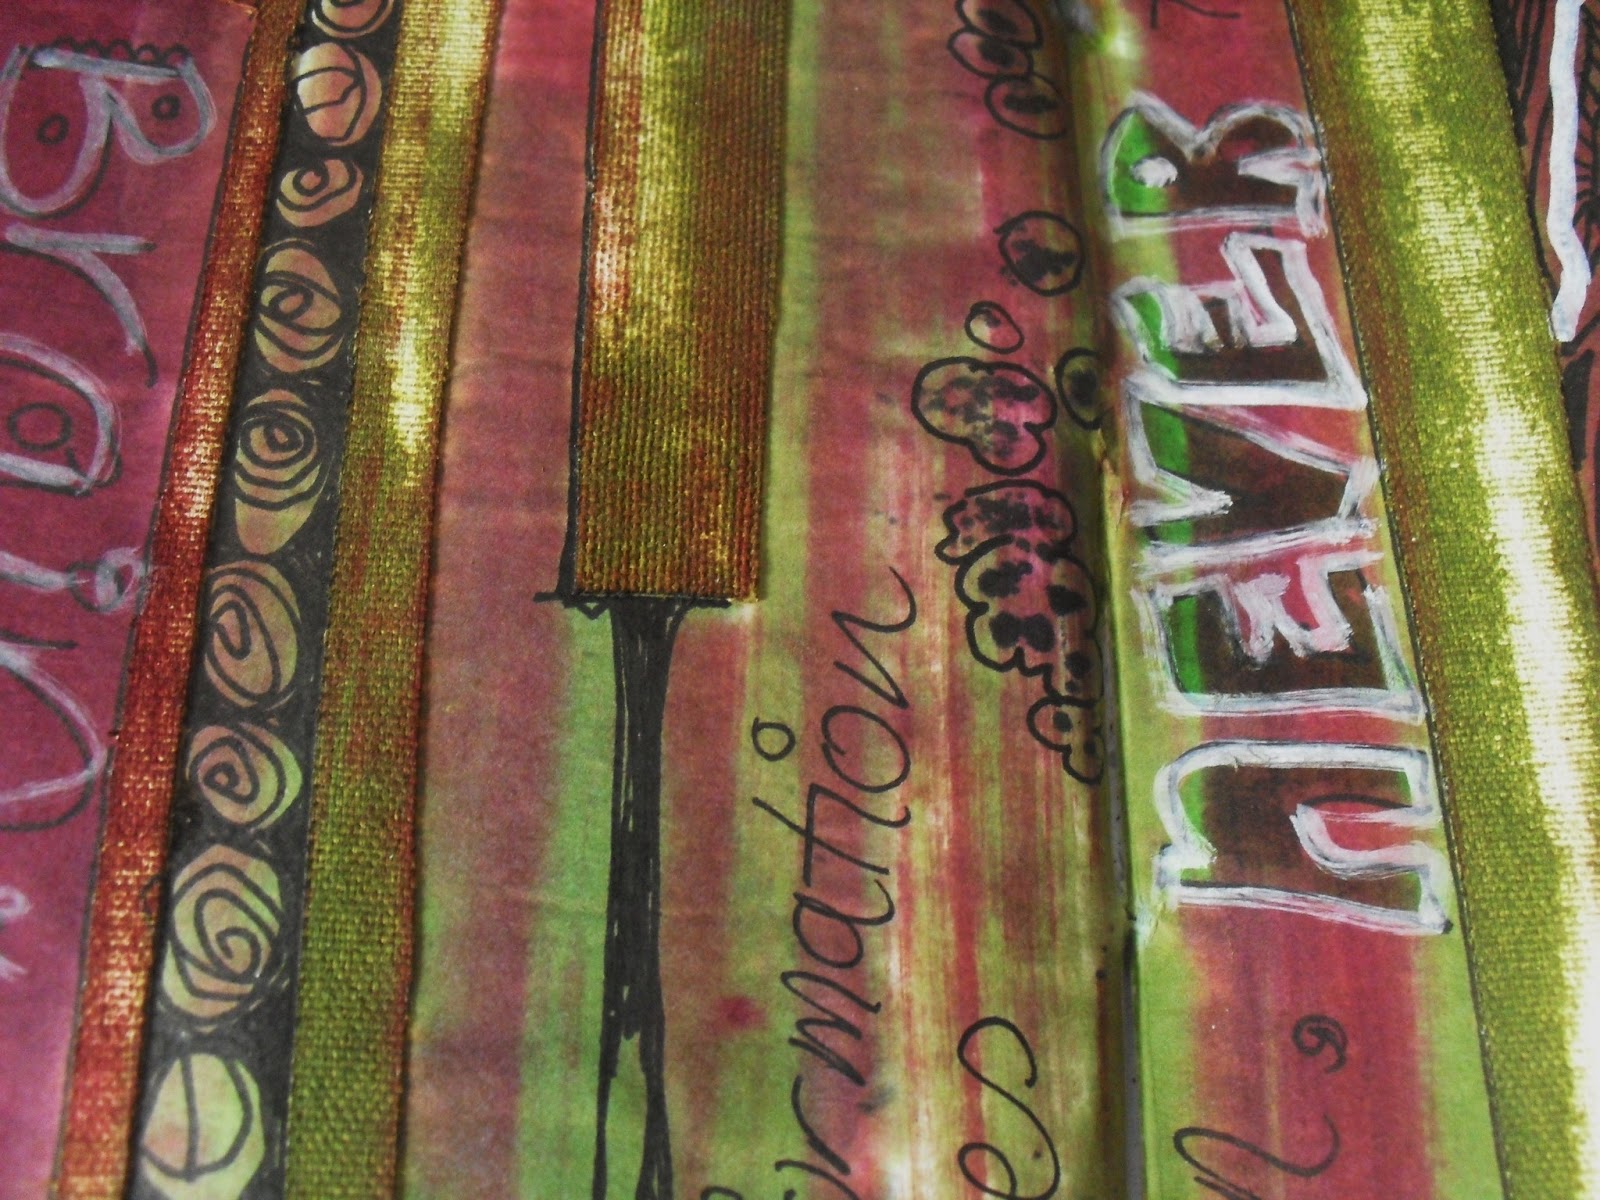
PaperArtsy Grunge paste and my Winged Design Mask to add some texture to the base and top elements and let dry before adding various colours of Treasure Gold to them. The middle section was painted black and stamped in Brilliance ink which then creates a nice "bridge" between the layers.
 I do love the spine, but more on that later.... and the pages are fun too.....

 I decided to keep the back cover more simple and didn't use the elements that are included in the kit. It still looks great and the advantage is that you can cut another couple of pieces of chipboard to A5 and make another book with those elements so you get extra value.
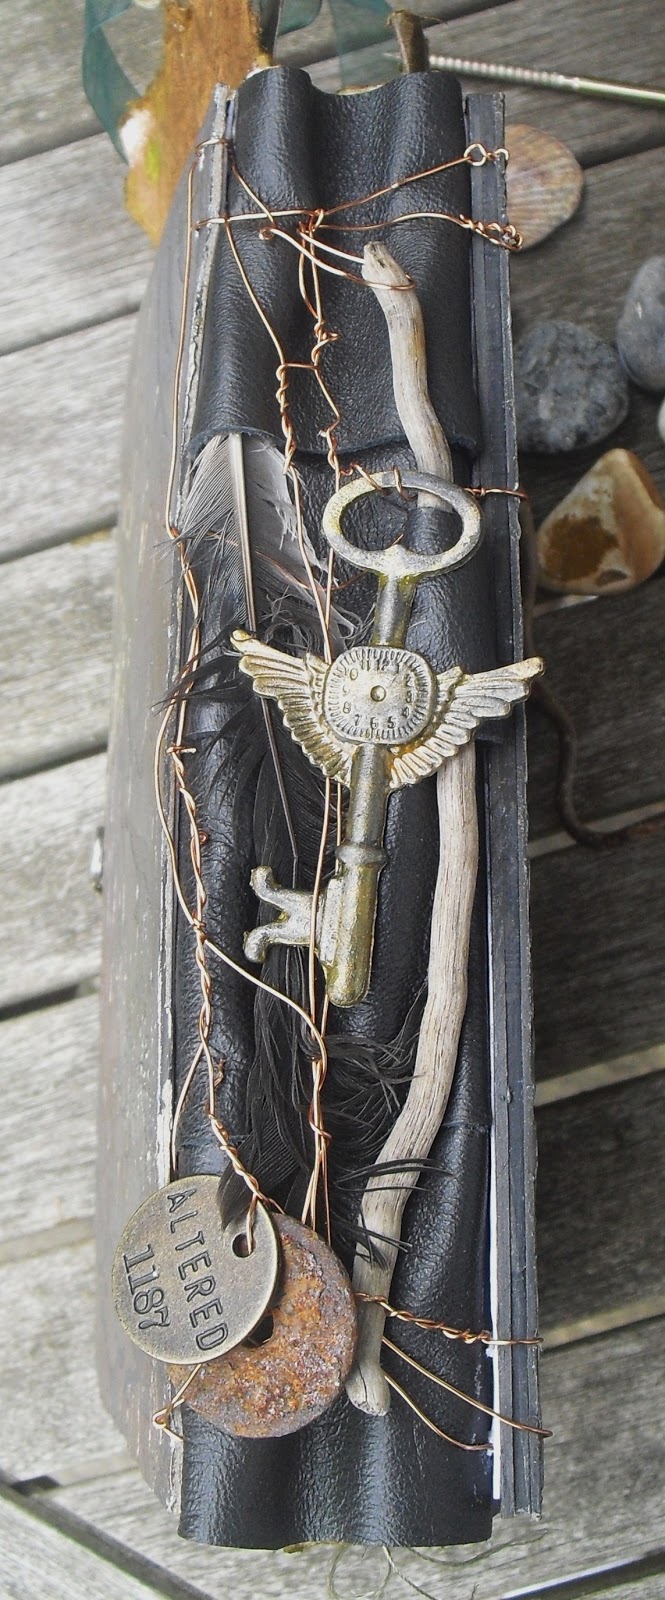
 So, the spine. I used strips of black leather for my spine and wired the covers together to give extra support and interest. I also gave me the opportunity to attach embellishments like the key and tokens and because the leather is in strips I could thread some driftwood and feathers into it too.
 I coloured the key with some of the metallic Distress Paints to change the colour tones which worked really well.
 All the pages inside are hand made paper. All the white pages are the last of the papers that my father made for me so they are very special to me. The other inserts and pages are all different papers that I love for the textures and tones, all are handmade though which keeps cohesion in the book to me. You can see here that I've used skewers in the binding. I decided to do this because hand made papers can be fairly fragile so this way added a lot more strength to the binding which will ensure the pages can't tear out as easily (Well, that's the theory anyway!)
 I've got pages that are all different sizes, too so lots of opportunity for creative playtime while working on them. I've also sprayed Dylusions ink in Dirty Martini and Melted Chocolate around the page edges.
I've already made a start, this is the first page. My Dad made sure that all the paper he made was sized so I could write on it without the ink bleeding out which is great. I turned the little page into a pocket, added a feather to the front and slipped a tag inside.
 This side is still in progress but already I know I'm going to have a lot of fun with this book.
 I'm popping in tags and bits all over the place and I just love it and look forward to seeing how it will evolve.
Hope you're still there and that you haven't dozed off.Have yourselves a creative and fun day too.

Wednesday 19 June 2013

WOYWW 211

Good morning friends.
Welcome to my desk today. Been a busy few days and my energy levels seem to go from very low to extremely low at the moment so productivity is low. This is my desk at the moment and I don't think it will change til Thursday at the earliest!
 
So here is the overview shot, bit blurry but I guess you can get the gist! On thing I was doing was working on lettering, Journals are good for that I think and I like this one, just need to tweak some of the letters
 This page I was looking at words and how the letters interact.
Then there are some backgrounds, testing out the card for my upcoming classes.  Paper and card can react so differently to the inks and stains so I like to makes sure they will do what I need them to do in class!
 This poor canvas is going through SOOOOOO many changes; I think this is the third layer, each totally different.......
 Just a couple of Father's day treats waiting to be homed. I know I'm late to the party but I've only really started enjoying the on the edge dies now!
 So there's not a lot of action in terms of finished stuff on my creative desk, but I have been busy as my baby girl turns 18 today. Of course we have to celebrate in style so I spent most of my time on Tuesday in the kitchen to create a cake worthy of the occasion...........
 This is not your average birthday cake; in our house a usual cake is one cake ; perhaps sliced in half and filled with jam or frosting and topped with frosting and a few sprinkles. Lets just say,  3 full gooey chocolate cakes, stacked with caramel.... Vanilla frosting with added gold lustre..... this cake is big!
Oh, and did I mention the top is pretty much a whole box of choccies....... now that you are all cursing me and salivating too; you'd better hop over to Stamping Ground to take a look at the other desks, courtesy of Julia. Have a great day folks, I think i'm off for a slice of cake.......

Tuesday 18 June 2013

Watercolour week at The Craft Barn

Good morning peeps
I hope you are well. This week over at The Craft Barn Blog we're looking at watercolours and today is my turn.
This is what I did; a tester page in my art journal with a new set of paints. All the details are HERE if you want a closer look.

 Also, just a quick plug; if you're not busy on Friday why don't you join me at The Craft Barn where we'll be creating this canvas......... Details HERE
Hope you have a good day; I'm busy filling the house with the smell of chocolate cake as it is my "baby's" 18th birthday tomorrow so it's a different kind of creative happening today! I'll show you the result tomorrow!

Links for the products used on the journal page
PaperArtsy Lynne Perrella stamps: LPC024 
Archival inks: Black and Cobalt 
Clear UTEE

Monday 17 June 2013

Guest design piece for Fashionable Stamping

Hi here friends
I hope you are all well and that you had a good weekend. A little while ago I was asked by the lovely folks at Fashionable Stamping if I would consider doing a guest design piece for them and here it is. The theme was Try a New Style/Try Something New. That was a challenge! The blog with all the fabulous DT inspiration and details can be found HERE.

I decided to be brave and try a new style; I took my inspiration from all the Magnolia style cards I often see and admire but don't do. So, without further ado, here is my card....

So, if you had seen my desk on Wednesday you now know what happened with the lace and doilies on my desk!
This is how I made the card. I started out by folding a piece of A4 white card in half and cutting a pink mat out of card. I edged the whole piece with the self adhesive lace.

 Once  I had done that I trimmed all the excess pink from the edges and used Victorian Velvet Distress ink around the edges. I cut a smaller mat from green card; distressed the edges with a paper distresser and used Bundled Sage Distress ink around the edges.
 I stamped one of my background stamps in the same Distress ink and used both colours of ink to colour a doily too.
 Taking the pink card I cut a couple of slits just inside the lace edge and added some ribbon. On the left side I tied a bow and on the right I just added a scrap of lace. I did this so that the ribbon looked neat and didn't overlap the lace.
 For the main image I stamped the image onto a piece of card and cut it out. I pressed the two ink pads onto the craft sheet and used a water brush to lightly colour the image.
 I detailed it with some yellow ink and there's a slight sheen to the wings (which you can't see) with copper Perfect Pearl mist. I added a thin slip of the lace to the green card and assembled everything as seen with double sided tape and 3d foam for the main image.
 Lastly, to finish I added a swirl, some flowers and gems and the sentiment.


 The result, a pretty card with no brown, industrial style grunge. Not my usual style at all but I'm pleased with the way it turned out.
So, why don't you pop on over and enter the challenge and Try something new..........
Have a great day.

Saturday 15 June 2013

Just having fun

Good morning friends
I hope you are all well. The tag I'm sharing with you today has pretty much been created using "scraps" and pieces from various technique experiments and I'm loving the way it turned out.
I also wanted to see if I could use my bird stamps in a more "grown up" way! I love using them in my journaling and on bright and funky projects but I thought I'd like to try something different........

 So here is my tag. I started off with an embossed silver mirricard tag that I hadn't used the other weekend. Just to see how things work on different surfaces I used a brush and various shades of Treasure Gold to dull it down. That works a treat though you don't get as strong a colour definition as you would if you were using black card for example. I edges the tag with Tim's Tissue tape and then added the scrap of mesh and the scrap of metal which were both leftovers from a previous project and lastly, I added one of the UTEE and metal embellishments I had made. So far so good but I knew it still needed something..... then I saw one of my birds that I'd stamped and cut out. I brushed it with copper Treasure Gold. it dulled down the image so I re stamped it over again carefully and added the Ranger black enamel accents and added it to the tag.
Bit of a blurry pic but you can see that  I added a rub on to the tag and I love how all the different elements sit together so well.
Hope you like it. I think it would be a great Father's day image, added onto a card or even a general men's card. So that's my take on using my funky birds in a  "grown up" way.
Hope you have a great day. Unfortunately I have to work so no more studio time for me today; tomorrow, however, is another day!

Ps you can find the bird stamps HERE (I used the small one from the set of 4)

Thursday 13 June 2013

Enameling Tutorial

Hi there
As promised; here is the tutorial for the coloured enameled look I used on my book cover panels on the previous post HERE. There's quite a lot of steps but I hope you give it a go yourselves as the effect is so much better in real life!

 I'll begin with a materials list, most products are Ranger, with the exception of the Treasure Gold.

Tag ( or whatever substrate you want to use but for this tutorial I'm using a tag)
Embossing Folder
Distress Paint -  I used Salty Ocean, Vintage Photo, Barn Door and Mustard Seed
Perfect Medium
Ultra Thick Embossing Enamel - Clear
Black Acrylic paint.

 Start off by embossing the tag with an embossing folder.
Cover the whole tag with Distress Paint. Brighter shades work best for this if you want the colour to shine through. Though experimenting with different tones and colours gives you a different effect.
 Once the tag has been painted it is important to dry it properly.
 For the next step you want to add some metallic shine to areas of the tag, so take some Treasure Gold on a brush and begin to lightly add it to the tag using a selection of colours. You can add some solid areas but keep some of the colour showing though.  (If you wanted to you could skip the paint and cover the whole tag with Treasure Gold which gives a great effect too.)
 Treasure Gold is solvent based so dries quickly. You can buff it up to a shine too before the next stage.
 For the next stage, cover the whole tag with Perfect Medium and
 cover with  clear UTEE
 Once you've covered it you want to tap a fair bit of it off leaving plenty covered but also some gaps. Heat it up with the heat gun to melt.
 Once it's cool it's time for the scary bit.
 Cover the hole tag with black acrylic paint getting into all the cracks and then rub it off before it's dry. You can add a spritz of water to make it easier. The paint comes off the UTEE easily but covers the non enameled  areas
 As a final touch use a finger to add further metallic highlights to the piece and you're done.
The finished effect is simply amazing. All the layers work together to create amazing depth and richness. Do give it a go, you know you want to!